Thursday, September 29, 2011

More Christmas Projects

Happy Friday!  It is the beginning of a 3 day weekend for me, yay!  I plan to do lots of card making and also some fall maintenance in the yard and garden.  Plus, I found a new recipe using Kale that I plan to torture my husband with LOL!  I hope you too have interesting plans.

Here are a few cards I made recently that were featured on the Heartfelt Creations blog on Wednesday, along with some other fabulous items created by the rest of the design team--you may want to check them out for ideas, I know I'll be casing a couple of them...

First of all, one of my all time favourite cards--it really didn't photograph well, but in person it is really fabulous looking:


Products Used For This Project
Other: Snowflake edge punch, OMC exclusive Holiday Cuttlebug embossing folder, black memento ink, Versamark, SU Silver embossing powder, white SU craft ink, silver Encore Ink, pop up dots, Spica glitter pens, Platinum (71) and Frost White (72) all purpose ink by Tsukineko, Gold liquid pearls, Copics: C1, C3, C5, R24, R39, YG67
Card size is 5.75x5.75. Punch edge of white card stock with snowflake border and adhere to blue base.  Cut out blue pane to fit within this and emboss with cuttlebug embossing folder.  Stamp sentiment in the centre of the blue embossed piece of card stock using versa mark, and then sprinkle silver embossing powder on it and heat set.  Rub white craft pad over all raised edges of the blue embossed panel and spreading it towards the centre but not over the sentiment.  allow to dry, and then rub the silver encore ink pad over the edges, but not extending as far as the white.  Allow to dry and then adhere to card base.  Stamp bell image on white card stock with black ink and colour with copies, cut out by hand.  Use Spica glitter pens to add accents, then use the liquid Tsukineko platinum ink to add some additional accents only to the "ribbon" part of the image, using a paint brush.  use the liquid Tsukineko frost white ink to colour in the white flowers in the image, using a paint brush.  Allow to dry, and then add gold liquid pearls to the centre of the flowers and allow that to dry, then adhere image to the card.


Next, another one I'm very happy with--in fact, I brought it to work and have left it on my desk for about a week now so I can look at it during the day.


Products Used For This Project
HCPC3427 Herald Angels Background PreCut SetHCPC3421 Dove of Peace PreCut Set (sentiment) HCD712 Bella Rose Die Spellbinders Fancy Tags Shapeabilities Spellbinders Layered Poinsettia Shapeabilities
Other products used: Versafine Vintage Sepia, Versamagic chalk ink in Jumbo Java, sponge, gold Stickles, pop up dots.
Card size is standard 4.25x5.5. Precut the base card stock and layers.  Stamp the background sentiment on the white panel as shown and add brown chalk ink over edges with sponge.  Adhere this to the card.  Cut the leaf swirl with the die cut, shape the leaves a bit and add a small amount of brown ink to it here and there with the sponge, and attach to the card.  Stamp the sentiment, cut it out with the die cut, and add some light sponging of the same ink, and adhere it to the card with pop up dots.  Stamp the poinsettias, cut out with coordinating die cut, shape (I simply used a wood skewer from the kitchen), put them together and attach randomly over the swirl, then add three dots in the centre of each of gold stickles.


Lastly, my first experiment with making a bookmark.  I am thinking these might be nice to tuck in to christmas cards as a mini gift...


Products Used For This Project
HCPC3324 Holly Berry Filler PreCut Set HCPC3422 Poinsettia Cheer Bells PreCut Set
Other Products used: Ribbon and gold cord, red eyelet, gold stickles, liquid pearls, SU corner punch, SU edge punch , SU markers in green and brown, Copic markers in red, mauve and green, white gel pen.
Cut base of bookmark from brown card stock, using edge punch on the bottom and corner punch on the top left and right corners to get the shape as shown.  Cut white layer to nest within the brown layer.  Stamp background word image over white base, and then stamp over that randomly with images from the Holly Berry filler set -- berries and foliage etc. using a direct to stamp marker method (colour the stamp with the coloured SU (NOT Copic) marker, and then stamp that on the paper.  Then stamp a bell image on a separate piece of card stock, colour with copies, cut out, and then cut an edge off it, so it is now in two parts, and then attach both parts as shown in the photo.  Punch a whole in the top of the bookmark, add an eyelet, and run some ribbon through it.  Use gold stickles and liquid pearls for extra embellishment, and add accents with white gel pen.

Saturday, September 24, 2011

Quick xmas cards - 91 days till Christmas!

Apparently there are only 91 days left till Christmas!  Eek!  I wanted to make up a set of cards for a friend and wanted to make sure they were thin enough to mail and a standard size.  I wanted the gift set to be about 20 cards, but certainly didn't have 20 our more hours to spend, LOL!  So I looked through my stuff and came up with a bunch of ideas for quick cards, and here are 5 of them, I'll show you the others another day, just to spread it out.


They are all featuring the latest stamps and dies from Heartfelt Creations.  The backgrounds were either dry embossed or DP from my stash, most of which is retired SU.  Colouring is with Copics and liberal amounts of glittery Stickles and liquid pearls to give glitz.

I hope you are well on your way to being prepared for the holidays, let the countdown continue!

Wednesday, September 21, 2011

Warming up to the Festive Season

Hi folks,
I am really warming up to the Christmas season, and have another holiday card to share with you, as well as a summer card I made a few weeks ago and hadn't posted yet.

For the Christmas card, I wanted to show off a way to use the HC stamps for a quick and simple card.  I have read comments here and there from people who say they want something that looks fabulous and can be done quickly and is mailable, so here is a sample of that

The image, from Heartfelt Creations, is stamped on an oval with a layered background, and just a tiny bit of colouring.  There is a strip of inexpensive ribbon from a bin at Micheals, and I used a gold Encore pad to swipe over the green layer which was dry embossed.  You could use pretty much any embossing folder to tie in--polka dots or swirls or snowflakes or whatever and any colouring medium on the angel.  The sentiment was stamped above.  I hope this gives you some ideas of quick and simple cards that will still have people oohing and ahing :-)


As for this summer card, I was thinking of my mom when I made it, who lives on the other side of the country from me.  It too features a Heartfelt Creation image:

Saturday, September 17, 2011

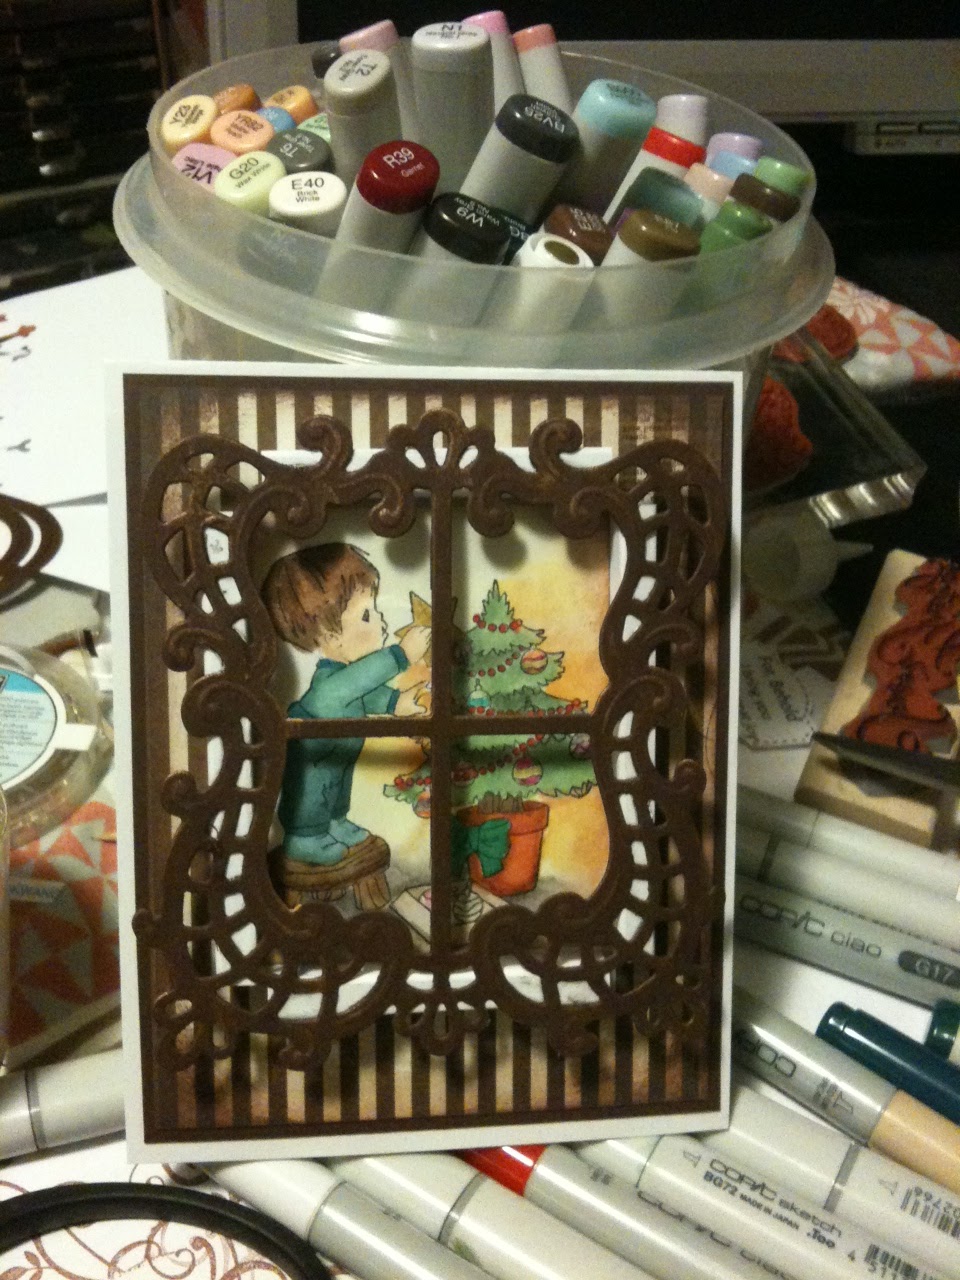
Christmas window

Just a quick post tonight, had to share the cutest card that I made this evening.  Instead of photographing it all fancy I'm sharing with you a bit of a peak at my "tidy" work area LOL!


I used a sweet Elizabeth Bell image I've had kicking about for a couple of years now.  I made a window frame around the picture (the white window ledges) using a tutorial at Splitcoast Stampers for a simple frame, and then topped it with a frame die cut from Heartfelt Creations.  The paper is from a new pad I picked up at the local craft store called Lost & Found Christmas by My Mind's Eye.  All colouring is with copies.


I hope you have all been having a good weekend!

Wednesday, September 14, 2011

HC Christmas Cheer collection

Today is the release of the new Heartfelt Creations Christmas Cheer collection.  It is absolutely fabulous, I'll be making christmas cards with these images for weeks (and surely years) to come!  I made many cards with it this past week, and today I'll share with you three of them.  To see more ideas check out the HC Blog.

Here's a vintage one with a beautiful angel:

Products Used on This Project 
Other Products used: Cuttlebug embossing folder "Holly Ribbons", Gold Encore Ink, Spica pens, Glossy accents, Stickles, Ribbon, Versafine ink. Spellbinders Lacey Ovals Spellbinders Ovals
Card size is 5.75 x 5.75 Emboss brown background layer, then rub gold ink on it, tie ribbon around it, and attach to card base.  Stamp background stamp on sahara sand rectangle layer, and then stamp swirly holly leaves over it (masking away the Holy Night sentiment), and then distress with scissors and ink, and then adhere to card.  Cut out lacey oval, add dots of red stickler between each scallop and set aside to dry.  Stamp angel on sahara sand card stock, use glitter pen to add accents, and then also add stickler.  Adhere to lacey oval with pop up dots, and then attach that to the card using more pop up dots.  Stamp the sentiment, cut out, colour the words with a red glitter pen, and then distress with ink and scissors.  Adhere overlapping ribbon using glue dots.


Here's a silver and blue one with embossing featuring a christmas dove - one of my DH's favourites:
Products Used on This Project 
Other Products used: Versamark ink, Silver embossing powder, clear embossing powder with sparkles in it, White ribbon, clear dewdrops, Copics used: N1, B000, Y000, white craft ink, Versafine black ink.
Card size is standard 4.25 x 5.5. Stamp background stamp using versamark on dark blue card stock and emboss with silver embossing powder.  Add white craft ink along edges.  Tie white ribbon around with bow.  Glue on dew drops using Zip Dry.  Adhere this layer to a base.  Stamp the nest in versamark on white card stock and emboss with silver embossing powder, cut out and adhere to card with pop up dots.  Use grey Copic pen to add some shading.  Stamp dove image on white card stock with black ink and cut out with coordinating die cut.  Add accents with yellow and blue copies, then cover the whole dove with versamark, and then emboss with clear embossing powder that has sprinkles in it.  Adhere this above the nest with another layer of pop up dots.


And finally a quick and fun one that I'm going to be making a bunch of for my annual christmas mail out:

Products Used on This Project 
Other products used: Ribbon, Cuttlebug embossing folder "Dots and Snowflakes", Stickles, Pop up dots Copics used: E33, E23, E25, YG63, Y00, YR12, B0000. R35, R37
Card size is standard 4.25x5.5. Emboss blue background layer, and rub white craft ink over it.  Allow to dry, then adhere a strip of white ribbon about an ink from the top of it, as shown in photo, then glue blue background layer to the card base.  Stamp images, colour, and then and cut out with coordinating die cuts.  Attach the flower to the lower right hand corner overlapping edges, and cut off the excess edges with scissors.  Attach the poinsettia leaf to the top left hand corner.  Punch hole in the bells, and then tie bows through them, then use pop up dots to attach the bells to the card as shown in the photo.  Finally, add some Stickles/Glitter to embellish.

Sunday, September 11, 2011

Catered Crop Challenge

Today I'm playing along with challenge FTR20 from Catered Crop.  It is a fun challenge that let's you use a recipe loosely....which is somehow how I usually use food recipes at home---ok I have some of this, but not any of that, so I'll substitute this and maybe throw in some of that LOL!  I thought it sounded quite fun :-)  And the bonus is, if you play along you have a chance to win a prize this week from Heartfelt Creations--a $30 gift certificate to their store (wish I was eligible for that, sigh....always so many more things I want).  Anyway, I hope you'll enjoy playing along too.

Here's the recipe:

  • Colors – Soft pastels
  • Stamps and Stickers – Butterflies, flowers, sentiment
  • Color Mediums – crayolas, stamping ink,
  • Embellishments – ribbon, glitter, lace, rosettes, tag, rhinestones/gems, pearls, ribbon
  • Techniques – use your own handwriting, embossing, stitching, make a bookmarker
  • Tools –Die cuts, digital stamps
  • Themes –Shabby Chic
 I used some pastels, and flowers, ribbon, glitter, faux stitching, die cuts, and used a shabby chic theme, so not too bad!
I used my new grand nestability for the first time, and really like the shaped card.  Will have to get more of these...eventually!  The stamps and dies used are all available from Heartfelt Creations.
Here's a list of the products I used making the card:
Inks: Versafine Vintage sepia for the shadow of the bird, Memento Tuxedo black for the bird, Versafine Onyx black for the sentiment and Tim Holz Distress Ink Black Soot for the swirly flowers, and Versamagic Jumbo Java and Gingerbread for the sponging. Used Spica pens and Stickles for sparkle. Crinkle ribbon is Buttercup from Sugar Creek Hollow. Stamps are HCPC3399 Wedding Dove PreCut Set and HCPC3304 Posy Patch Swirls. Copics used are E70, Y00, Y23, YR21, RV95, RV11, G12, G24, YG63. Used a stamping up fine tip brown marker and a white gel pen for the faux stitching. Spellbinders Grand Nestabilities Labels One and Shapeabilities Ribbon Tag Trio Three.


Wednesday, September 7, 2011

Happy sunny days...

Well, many of you are back to school or have kids back at school...where I live back to school started yesterday so I've been hearing all about it from my friends with little ones.  I hope you and your families are enjoying the adventure of a fresh new year :-).

This past weekend I made a bunch of Christmas cards, and have more planned for the coming weekend too.  Next week, you'll be excited to know, will be the grand release of a Christmas collection from Heartfelt Creations that is absolutely fabulous!  Not only are there gorgeous images, but a bunch that can be done with minimal colouring, perfect for those of us who need something quick and easy to make that still looks fancy.

Anyway, enough talking, I'm sure you want to see the cards I have for today more than read my ramblings LOL!

First of all, here is another card using the basket die.  I'm currently brainstorming how to combine this with some Christmas images, maybe some ornaments or poinsettias---just you wait and see next week!  For now, it's a summer basket.
Products Used on This Project HCPC 3411 Woven Basket PreCut Set
HCPC 3407 Botanical Floral 2 PreCut Set
HCD 714 Decorative Layered Basket Die
Rose Creations Shapeabilities
Other products used: Sizzix Damask embossing folder, Basic Grey Rhinstones, cards stock that has been previously painted, pop up dots, Staz-On ink
Emboss and sand main background, and adhere to frame and base as shown in photo. Use textured card stock (in this case the card stock had previously been painted using the Faux Barn Board technique) upon which to stamp basket with, and then cut out using coordinating die. Adhere to card using pop up dots. Stamp flowers and leaves on coloured paper, cut out with coordinating die cuts, shape using fingers, and then layer over and around the basket as shown in photo. Embellish with rhinestones.

Also, here is a card using one of my favorite images--my hubby really likes this one, will have to find a way to work it in to his birthday card, despite that being in the middle of winter....hmmmm....

Products Used on This Project
1166G Beary Relaxed
HCPC 3319 Simple Filler Stems PreCut Set
Other Products used: Corner punch, SU black marker, Adirondack espresso ink, white card stock is Neenah Copics: E43, E44, E49, E25, E21, E31, E33, Y38, G24, B0000, B26, B23, B21, B02, RV02
Card size is standard 4.25x5.5 Stamp image in centre of white card stock and colour. Use marker to colour the words wanted and stamp in the top and bottom corners as shown. Crop base card stock border layer, and punch corners in border layer, then adhere the layers of the card.

Enjoy your week, and the fresh start of September :-)

Wednesday, August 31, 2011

Christmas is in the air!

In the past few months I've watched so many of my fellow bloggers get a head start on Christmas preparations, and finally I have gotten on the bandwagon.  Here is a fun Christmas card  I used combining a number of different elements:


I used a fern stamp and die cut as tree branches, and then decorated them with liquid pearls and stickles and some ornaments.  All stamps are from Heartfelt Creations.  I had a lot of fun with this one, I hope you like it!

This weekend I have plans to spend Saturday making Christmas cards with a group of gals, I'm so looking forward to it!

Have a great Wednesday.

Products Used on This Project 
Other Products Used:Stickles, liquid pearls, Versafine Vintage Sepia, pop up dots Copics: Y28, YG67, Y15, R46, G21
Card size is standard 4.25x5.5 Stamp background stamp on card stock, then add ink along edges using sponges, and stamp fern image on top left hand corner a few times.  Cut out lacey circle and stamp sentiment, then cut bottom part off as shown in photo.  Stamp fern 3 times on green card stock and then cut out with coordinating die cut.  Stamp ornaments, colour with copies.  Adhere all items as shown in photo.


jfdkafjdk;l

Friday, August 26, 2011

Happy Friday!

It's finally Friday!  Yay!!  I am super happy the weekend is here, but have plans to spend most of the weekend finishing a big school project that is due next week (insert big sigh here!).  And after that I'll have no schoolwork for a while (even bigger YAY!).

I thought I'd share a card I made a while back but never posted, down below.  I worked hard on my Copic shading on this one, and like how it came out.  I'm looking at taking the Copic intermediate course, and am wondering if any of you have taken it and what your feedback is???  ie. did you find it worthwhile?  I'd love to read your comments if you have taken it....since of course(!) I'm wondering if I want to spend $200 on another course, or buying more markers LOL!


Anyway, another thing I wanted to do today was give a huge shout out thank you to Laurie (Doodle Pantry) for the fabulous watermarks she's made me in the past and now made for my mom, she is just so nice and does such great stuff...totally recommend her if you need a custom made graphic for labels or a watermark.

Oh yes, and instructions for the card--all stamps from Heartfelt Creations:


HCPC 3393 Tea With Bella PreCut Set
Fancy Tags 3 Shapeabilities

Labels 1

Other: Copics: Y02, Y06, Y08, E70, W1, YG63, G85, B000, B32, B45 Basic Grey Pearls, White paper is Staples 110lb, Coloured paper is SU
Card size is standard 5.5x4.25 Stamp image on white cardstock and then cut out using label die cut.  Use airgun to add colour in background, then colour image.  Cut out swirly tag using die cut, then using scissors cut in half.  Adhere over base layers as shown.  Embellish with pearls.  Adhere main image over top using pop up dots.


Wednesday, August 24, 2011

Fleeting summer days

Well, it seems that before it even really began, summer is almost done!  I hope you are all enjoying these last few weeks before back to school and autumn tasks pay a visit.  I've got a big school deadline to meet by September 1st (eek, not too many more days) but then after that I'll have more free time, so I'm hoping the sunshine will stick around for a while after that.  I'm looking forward to catching up with some of you then.  In the meanwhile, I have managed to put together some cards using the images I coloured while listening to my online lectures....got to love multi tasking!
Here are two cheery flowery ones, both featuring images from Heartfelt Creations.


Products Used on This Project 

 Other products used: Spica glitter pens, liquid pearls, Stickles, organza ribbon Copics used:  E43, E41, E40, V14, V17
Fold card in half, and stamp the basket image so that it overlaps the fold -- that is, goes off the edge.  The goal is to create a crease that is uncut.  Use coordinating die cut to cut the image out--so you are cutting through both the top and the bottom layer, and the crease is on the inside of the die cut.  The result is a card with a crease at the top and the whole card, front and back, is shaped like the die cut. Then colour the basket, use Spica glitter pens over the scroll design, and add liquid pearls over the circle dots in the image.  Colour the flowers.  Stamp the image a second time on another piece of paepr and cut out the flowers, colour and add glitter to edges.  Adhere over the flowers on the card.  Tie ribbon in a bow over the edge as shown.


Products Used on This Project 

Other Products used: Copics (G40,YG63, V09, V15, V17, Y06, Y08), brads
Cut base card stock and add brads in each of the four corners.  Cut out doily with die cut and adhere to centre of card.  Stamp image on white card stock, colour and then and cut out with circle die cut, ensuring to avoid cutting edges of leaves (accomplish this by precuting edges of leaves and pulling them "out" of the die cut before running through die cut machine).  Adhere to centre of card.


Saturday, August 20, 2011

Decorative Basket collection

I've got another card to share with you today using a stamp from the new Decorative Basket collection that Heartfelt Creations recently released, plus two other cards for you (I'm enjoying a bit more time back in my craft room!)

Here's my favourite one I've done lately:


Products Used on This Project 
Other products used: Gold stickles, pop up dots, red ribbon from my stash, SU fine tip black marker, floral DP Copics used:  Y08, R35, R37, G85, G24, V15, V17, E43, E41, E40
Card size is 6.5x4.78 To create tiles cut out squares of DP, and then slightly larger squares of cardstock, adhere together, then glue to the base card stock leaving space in between.  Stamp main image, cut out with die cut, use die cut as stencil and use fine tip marker to add faux stitching along edge.  Colour image and then adhere to card using pop up dots.  Make a bow with ribbon, add a flower pearl centre to it, then adhere that to the card with a pop up dot as shown in the photo.


Next, is one I made featuring a wishing well stamp, I think this could be used for so many different things:


Products Used on This Project 
787G Wishing Well 
HCPC3407 Botanical Floral 2 PreCut Set 
HCPC3411 Woven Basket PreCut Set (sentiment) 
Rose Creations Shapeabilities 
Fancy Tags Nestabilities 
Labels 17 Nest abilities
Other products used: Liquid pearls, red DP, Swiss Dots Cuttlebug folder, lace from fabric store, Antique Linen Distress Ink, Adirondak Espresso Ink, SU dark green marker, SU real red marker. Copics used:  C1, C3, C5, E43, R44, G24, G85, G20, G21, Y26, R35, R37
Card size is 4.25x5.5 Cut cardstock, then emboss background panel.  Adhere lace to card base and middle layer.  Stamp image, cut out with die cut and colour.  Then use sponge to apply distress ink along edges.  Adhere to card using pop up dots.  Stamp sentiment, using SU marker to colour just the words of the sentiment wanted.  Cut out with die cut, and then use die cut as stencil to add faux stitching using a fine tip marker.  Adhere to card.  Stamp flowers on coloured dp using coordinating ink, cut out with coordinating die cut, and then adhere to card.  add centres to flowers using liquid pearls.


Finally, here is a wedding one...this is the time of year for them!


Products Used on This Project 
Other products used: Tim Holtz Antique Linen Distress Ink, Copics (B34, B63, YG63, Y02), pop up dots.
Card size is 5.5x4.25 Stamp flower image twice, on the main panel, as shown in the photo.  Add colour to background (Copic airgun used here, but you could use sponging).  Colour images, and then add distress ink along the edges with a sponge.  Stamp sentiment, and cut out with oval punch or die cut.  Cut out fancy label using die cut.  Adhere layers as shown in photo.