Translate

Sunday, March 27, 2011

Cute and Cuddly with Sentimental Sundays

Today's challenge at Sentimental Sundays is to make a Cute and Cuddly themed card, with (of course!) a sentiment.  As soon as I saw the challenge I knew I had to dig out one of my House Mouse stamps, and this one here is one  of my all time favorites!  I decided I could stretch the Lucky theme from St. Patty's a bit longer, and use this for a March birthday.


The sentiment is one from the Lucky Sentiments sets by Raindrop Echo Designs, available at Whimsy Store.

Here is the link where I found the free digi for the shamrock:  http://rubberstamping.about.com/od/digitalstamps/ss/Four-leaf-clover-Free-Digital-Stamp.htm

Wednesday, March 23, 2011

Spring is on the way!

Happy Wednesday!

Here on the West Coast Spring is definitely making an appearance.  The crocuses in my front lawn are blooming, and the birds at our feeders are multiplying every day, swooping around in the air and singing so clearly that we can hear them inside even with the windows closed.

To celebrate that I have a daffodil card for you, in hopes that a few of those bulbs in my garden will have survived the winter an make an appearance soon :-)

 Products Used on This Project


HCPC 3307 Jean Pocket/Ball Can PreCut Set


HCPC 3319 Simple Filler Stems PreCut Set


HCPC 3359 Daffy Daffodil PreCut Set


HCPC 3373 Dutch Iris Medley PreCut Set


HCD 709 Springtime Medley Die


HCD 710 Decorative Oval Window Die

Card stock is SU
Acetate sheet is from Staples (the cheapest inkjet acetate sheets available)
Black ink is Memento except on the Acetate which is Staz-on
Coloured ink is SU
Straw ribbon stuff is recycled from a bundle of flowers I got a while back

Card size is 5 x 5

Cut and prepare base and background sheet, layering the card stock and machine stitching.

Cut the decorative frame from blue card stock using the die cut, and using the stencil marks add accents. Adhere to base using pop up dots.

Stamp image of jar on acetate sheet using Staz-on ink, allow to dry, then cut out.

Stamp image of jar on white card stock, stamp stem and foliage over top of it and colour then cut out, then adhere the acetate layer over top, tie ribbon around the bell jar then adhere to the base using pop up dots.

Stamp flower in orange ink on yellow card stock and cut out with coordinating die cut, then layer over the jar as shown and adhere with pop up dots.

Sunday, March 20, 2011

Focus on the Sentiment with Sentimental Sundays

Happy Sunday folks!

Today at Sentimental Sundays we have a challenge to make a card focused on the sentiment.  I like this challenge since it means a bit of a break from colouring :-)  With St.Patricks day having passed by so quickly this week I wanted to (belatedly!) celebrate!


The sentiment is one from the Lucky Sentiments sets by Raindrop Echo Designs, available at Whimsy Store.

Here is the link where I found the free digi for the shamrock:  http://rubberstamping.about.com/od/digitalstamps/ss/Four-leaf-clover-Free-Digital-Stamp.htm

Wednesday, March 16, 2011

CAS and almost CAS with Heartfelt Creations

Morning ladies!


Recently I promised to show you a CAS (Clean and Simple) card at least once a week....and I haven't posted in a week...aak!  This isn't because I haven't been creating, since I have been busy making cards, just have been so busy with work that every spare moment has been in my craft room making pretty things instead of blogging....


Ok, so here is a CAS card that was posted last week on the Heartfelt Creations Blog.  It was floating in my head one night and first thing in the morning even before breakfast I jumped in my craft room and whipped it up in less than 15 minutes.


Products Used on This Project

Card size is standard 4 1/4 by 5 1/2 Stamp Iris image twice using brown ink, once on lower left hand edge of main panel, and once on other (scrap) cardstock.  Colour both the same (Copics used here YG03, G21, G99, BV00, BV02, E04, V93).  Use the die cut to cut out the one on the scrap cardstock, and then layer it over the other one on the main panel using pop up dots. Stamp sentiment using black ink in centre of card.  Assemble layers of cardstock and adhere and then add a few Rhinestones on the top right hand edge for embellishment.


And here is an almost CAS card that was posted this week on the Heartfelt Creations Blog.  This one took about 30 minutes (at the most), and was super easy, just took a bit of time for the colouring of the background.

Products Used on This Project
HCPC 3372 Dutch Iris Frame PreCut Set
HCPC 3373 Dutch Iris Medley PreCut Set
HCD711 Decorative Dutch Iris Die
Oval Nestabilities
Scalloped oval Nestabilities

Instructions:
Stamp background image in brown ink on to white card stock and colour - Copics used here V15 and Y08.
Cut oval out of white card stock and stamp iris image on it in brown in and colour (same colours as above) and add blue in the background for the sky (can use airgun or sponges).
Stamp iris image on coloured cardstock using matching purple ink and cut out using coordinating die cut. Add extra colour on edges in purple ink and use Yellow Glitter Pen (Spica used here) in the centre, then add some yellow flower soft. Adhere all layers together as shown in photo.


There are lots of gorgeous creations to be found this week on the HC blog, if you are looking for ideas.

I'd better get ready for work now, just dropping in at the crack of dawn to say hi to you all, but I'll have another creation for you later in the week.  Have a great day!

Wednesday, March 9, 2011

New Dutch Iris Release!

Spring is in the air, and there is a new gorgeous collection released today by Heartfelt Creations featuring some beautiful spring foliage and flowers.   There are a 45 examples posted on the Heartfelt Creations blog of what the Design Team has created with this new release, it's very inspiring, so check it out!

What I liked best about this collection when I started playing with it is that the images are easy and quick to colour and work with, and are multi purpose--thank you, birthday, sympathy--it's all gonna work.  I've got three cards I'll be sharing with you in the next few days (hint, if you want to see all 3 of them now check out the HC blog), and 2 of them took less than 20 minutes each to make!  Today's card was a bit more "fancy" (got to try and impress you when there is a new release!) and yet it was also surprisingly easy and quick.

So for today's creation I used the flap card tutorial from Splitcoast Stampers.

Here is what the card looks like closed:


And here is when it is being opened:


And here is the inside when it is fully open:


Products Used on This Project
HCPC 3373 Dutch Iris Medley PreCut Set
HCPC 3377 Sympathy Sentiment PreCut Set
HCPC 3367 Vintage Life Background PreCut Set
HCD 711 Decorative Dutch Iris Die

Finished card is 5 x 4. Cut base card stock to be 12 x 4.  Layer the die cut near the end of the card stock with the goal to cut the edge.  Use your embossing mat between the die and the card stock from the mid point of the die down, so that it acts as a mask and only the top part cuts.  The effect is to give you a fancy edge.  You could alternatively cut with edged scissors.  Score at 5 and at 10 and then fold.   brush the fancy edge with white craft ink.  Your base is now ready Stamp background image on to white paper with green ink.  Add light brown ink to edges.  Adhere to base as shown in photo.Stamp image of iris on white card stock using brown ink, cut out with circle die cut.  Add colour to background (Copic airgun used here)  Colour the Iris (BV00, BV02, Y17).  Adhere lace around edge of circle.  Adhere magnet behind circle on the lower half, and adhere upper part of circle to flap using pop up dots.  Adhere other matching magnet on to the inside of the card, and cover that with a decorated piece of paper.  Add sentiment to top of card to finish off.

Monday, March 7, 2011

Blog Hop with ScrapMart

Welcome!

Today is day two of the ScrapMart Bloghop featuring Heartfelt Creations products.

You should have come here from Lisa's site, and if you want to check out the details of this weeks bloghop, check out the ScrapMart page here.

I toiled away at a fabulous creation, and then realized I'd almost posted a preview for you of this weeks new releases--oops!  At least I caught it before posting went live...you'll have to wait a couple more days.  So stay tuned for Tuesday March 8th at 12:00 Midnight Eastern to see to fabulous new Dutch Iris collection!!


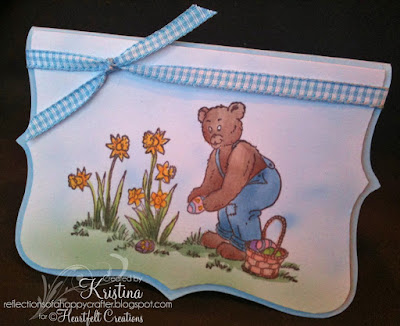
Until then, I put together a lovely little Easter card, that is super sweet and was also super quick to make!  So many of us are busy that I've decided to weekly showcase at least one quick and easy idea, so here you go:

The image is stamped on white card stock using Brown Memento ink, and then cut out using the Bigz Top Note die.  The card base is cut out with the same die, and after colouring the image it's simply adhered with pop up dots to the top of the base.  Add a bit of ribbon, and voila, it's ready to go!

I wanted to dress it up a little bit more, and I thought with the easter egg hunt image on the front it would be fun to put an egg "hidden" on the inside, so here's what the inside looks like:

Products used:
White card stock is Staples 110 lb
Blue card stock is SU
Colouring is with copics
Ink is Memento
Ribbon is SU

Saturday, March 5, 2011

Pearls and Lace at Sentimental Sundays

Happy Sunday!

Today at Sentimental Sundays we have a nice and easy challenge for you--Pearls and Lace (plus a sentiment).  I hope you will play along with us :-)

For my card I used both Tule and gathered lace, both which I picked up at the local discount fabric store, and then I added some Basic Grey pearls to the centre of the flowers.

The sentiment is one that I really like, from Heartfelt Creations, which I think is perfect for an encouragement card.

The flowers are layered using pop up dots between the layers.  There is a layer of Tule overlaying the whole card above the sentiment and below the flowers/hummingbird, kind of like I might have used velum, but instead used the Tule.  Here's a shot from another angle:

I do hope you will join us with this weeks challenge, it will be fun to see all the girly lace and pearl cards that get created :-)

Blog Hop with Heartfelt Creations


Happy Saturday all!

Today the Design Team of Heartfelt Creations decided we wanted to take a chance to say thank you to the folks over there at HC and demonstrate that with a little blog hop and showcase some fabulous creations made using their products.  Here's the closed up view of the card I created:

I felt a lot of pressure coming up to today's blog hop, since my design team sisters are fabulous designers and over the top creative and I know they have all been working to showcase their best work, so I wanted to make something worthy and interesting.....oh goodness, and my head is still back in vacation mode on palm trees and fruity drinks, sigh...finally, with no ideas coming to mind I checked the resources section at Splitcoast and found a tutorial for a 3 tier pull out card that I hadn't seen before..... yay!  Above you saw what it looked like closed, and here is what it looks like when it's partially opened up:

Don't you love that hummingbird?  It is really easy to colour and cut out using the die cuts and one of my very favorite items I've gotten from HC, so I wanted to make sure I used it on this Thank You project for them.  It has been such an amazing experience these past months being on a design team with such kind and real people to spur us on and share with us such wonderful artwork that it makes designing easy to do.

     And finally, the completed photo when it's fully pulled out:


Here is the list of the blog hop participants, the next stop is Lisa


And in case you want it, here is the full list:


Lisa             www.lisasomerville.com  
Gini             www.ginicagle.blogspot.com 
Kerry           www.thestampingbug.blogspot.com
Olga            http://craftieodamae.blogspot.com
Anita           www.hoveyhut.blogspot.com
Kristina      ******YOU ARE HERE******
Lisa             http://what-a-beautiful-mess.blogspot.com/<--- Your next stop
Dee             www.stampincuziluv2.com
Loretta       http://lovetocreate.blogspot.com/


Wednesday, March 2, 2011

Stained glass card

Hi folks!

Well, it's been almost two weeks since I've been home from holidays and still getting my head around being back to normal life...sure wish there was someone to make my bed and feed me all the time LOL!  I'm sure it would be boring to stay at an all-inclusive resort too long, but hey, how long would that be???  I think I'd be able to last quite a while before boredom struck!  Unfortunately, we have to work to pay for these treats, so it's been busy at work since we've been home with lots of overtime catching up, and my poor craft room has barely seen me.

I did make up a card though this week, and I have to say I quite like it!  The card is made from acetate and the light streams through it, it looks super cool in real life.  Here is a pic for you to see:


Products Used on This Card - all stamps are from Heartfelt Creations


Card is standard 4 1/4 by 5 1/2. Card base is clear acetate sheet. Fold acetate sheet in half and stamp stained glass image on front using Staz-on or other permanent ink.  Set aside to dry.  Stamp image of cross on white card stock using black ink, cut out, and accent with grey (Copics C1 and C3 used here).  Colour flower in red (Copic R46 used here ).  Stamp duplicate and cut out flower, colour with same red, and layer on top of the main flower using a pop up dot.  Curl edges up of leaves and petals.  Go back to acetate sheet and colour in the stained glass image on the reverse side of where you stamped it, using permanent markers (Sharpies used here).  Allow to dry and the layer on the cross over top of the stained glass background.