Translate

Thursday, December 30, 2010

Post edited to add:
Eek!!  The problem with prescheduled posts when you aren't paying attention LOL!  This post was set to go off some time early last week, before Christmas and now I see it posted during the night just in time for New Years.  Hope it gives you some ideas for next year.  Now I'm off to investigate what other posts are gathering dust waiting to spring on me unexpectedly :-).


Unedited portion of post:
Recently my sister in law came over to visit and make Christmas cards with me.  She wanted some ideas of what to make that would be quick and easy, be mailable, and wouldn't need a lot of expensive embellishments.  We decided that we should use images that wouldn't need colouring, since that takes so much time, so off to my stash I went in search of the perfect quick card solution.

This was a fun challenge for me, and here are four cards that each took under 10 minutes to make which I put together for her as samples.


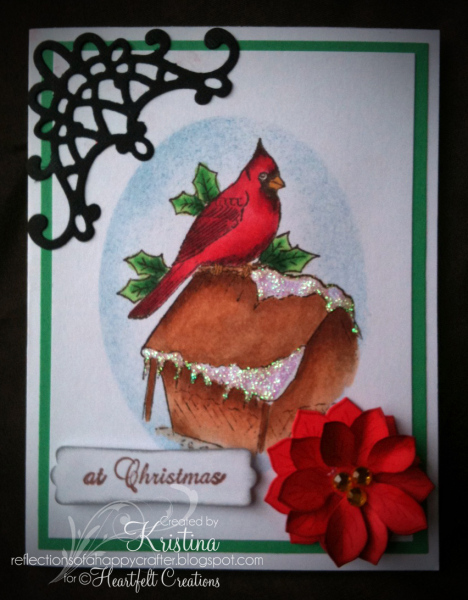
This first one was made using two stamps, one from an older SU set, and another from CHF.  It was the most time consuming of them all.


This one uses the SU Dasher image, and DP.  Dasher is stamped using versafine ink and there are stickles spread over the antlers.


This one is a Thomas Kinkaid image stamped in Sepia Versafine on old photo paper I found in my cupboard.  The edges are inked with Creamy Caramel ink using a sponge.


This last one is my favorite, and the easiest and quickest of the bunch.  The Thomas Kinkaid image is stamped using Black Staz-On on to old glossy photo paper.  It's matted and then I added the sentiment tag (popped up) and rhinestones.

In case you are running behind getting ready for your Christmas cards, or just don't have a lot of time to spend, I hope these give you some ideas of simple cards that can be made.

Monday, December 27, 2010

Top 10 of 2010 - Blog Hop


Hi folks!
Today we've got a blog hop to follow, to celebrate the best of 2010.  It's a bit different than other blog hops since today we are each showcasing for you our favorite 10 cards that we made during the past year.
This was a tough call, but here you go, the cards I'm proudest of from the past year, and which I plan to top (somehow!) in 2011.

Here's one using a velum overlay featuring a digi from Tiffany Doodles:


A special baby card using a wonderful image from Mo's and a heartwarming sentiment from Raindrop Echo Designs:

A country flavoured card featuring an image from Bildmalarna:

The card I made after the copic certification course, experimenting with new techniques--the image was from Cornish Heritage Farms by artist Sara England.

The first Thomas Kinkaid image I fully coloured in - The image is stamped on Velum and I coloured the underside.  
I sure was sad this year when they shut down Cornish Heritage Farms, though it wound up forcing me to fill my wish list and my craft room cupboards sure have a lot of beautiful pieces of rubber now to lure me in there.
 

Experimenting with a new technique--the background is faux barn board (tutorial at SCS). and the images and die cuts used here are from Heartfelt Creations.

Another card using Heartfelt Creations dies and images.  I think this was one of my hubby's favorite cards this year.

And another sample using a Thomas Kinkaid image from Cornish Heritage Farms, as well as stamps and die cuts from Heartfelt Creations to accessorize.

Inspired by my friend Alica's Tri-fold cards I finally gave in and tried it...this was my first one ever and I just love how it came out!  This was a special card too, as it was my submission card for the Heartfelt Creations Design team competition which I am so thankful to have been a part of these past few months.

And finally, to finish off, here is one where I decided to dig out my heat gun and go hog wild with the heat embossing and created this glittery masterpiece (also featuring images from Heartfelt Creations):


Check out the list of other folks participating in this blog hop and join in too if you'd like, at this link:  http://mrsweyremaster.blogspot.com/2010/12/my-top-10-cards-of-2010-blog-hop.html

This was an exciting year for me, I had the opportunity to work on some fabulous design teams with some super talented artists and other designers and it has been a wonderful pleasure.  I've started following a lot of your blogs regularly, and also appreciated how many folks have taken the time to visit mine with kind and encouraging words.  At this time of the year as we look back at the year past and give thanks for the things we appreciate from the year I'd like to give thanks to all my fellow crafters who've inspired me with their cards when I visited their blogs, who left comments for me on my cards, and also to the artists who's work I've had the pleasure to showcase.  Best of wishes to you all for the year ahead!


Wednesday, December 22, 2010

Glitzy Tri-Fold

Today at the Heartfelt Creations blog there are a bunch of gorgeous Christmas and Winter creations to inspire you and celebrate this season, I hope you'll go take a look!

Here is one of the cards I made that is posted there this week.  I decided to make a tri-fold card, they really aren't too much work and are so impressive for folks to receive, what with moving pieces and all.


I didn't use any DP on here, everything is created using stamps.  There is a full set of instructions on the Heartfelt Creations blog today, and if there are any questions you have about technique or supplies, please leave a comment and I'll get back to you.


Products used:

998X Holly Background 
HCPC 2291 Regal Poinsettia 2 PreCut Set
HCPC 3348 Cardinal Pine Cone Border PreCut Set
HCPC 3352 Snowy Cardinal PreCut Set 

Versamark and SU gold embossing powder
Memento Ink and Copics
Basic Grey Rhinestones


Challenges:
Allsorts challenge - anything goes
Creative inspirations challenge - anything goes Christmas
I did it creations - anything goes
Totally Gorjuss - for someone special
Craft your passion - Christmas
Paper Playtime - Christmas
The crafty pad - anything goes
Paper Take Weekly - anything goes
Sweet Stampin Challenge - Celebrations
Stamps R Us challenge - Anything goes
Stamping with dragon - Make it sparkle

Tuesday, December 21, 2010

Vintage style Cardinal

The countdown to Christmas continues, Christmas eve will be Friday and Christmas on Saturday, how did the time come so fast?!

Today I've got a vintagy style card for you that was actually super quick and easy to make.  It was my first time experimenting with this ribbon technique---which most of you have been doing for months LOL!--and I really like how it worked with this ribbon which has some wire in it on the sides.

All stamps used on this card are from Heartfelt Creations, and full instructions will be posted on their blog tomorrow, so I'll give you a link to them then.  Until then, if there is a question you have about technique or how it was done please let me know in the comment section!


Products used:
Snowy Cardinal PreCut Set Product ID: HCPC 3352
Holly Background Product ID: 998X
Ribbon is the type to decorate the tree, bought at Costco
Memento Ink and Copics


Challenges:
2 Sisters - Christmas
Fresh Brewed - Merry Christmas
Stampin for the Weekend - Christmas
Really Reasonable Ribbon - Photo inspiration (the vintagy glitzy feeling of the photo I think is captured in my Stickled snowy area on the branches of the tree)
Copic Creations - Sparkle
Gingerloft Challenge - Distressing
Allsorts challenge - anything goes
Creative inspirations challenge - anything goes Christmas
I did it creations - anything goes
Craft your passion - Christmas
The crafty pad - anything goes
Everybody Art - First Snow

Monday, December 20, 2010

Last minute Christmas cards

Christmas is just a few days away and I bet some of you, like me, are making up some last minute cards.  Here's a quick and easy one I made up last night using a freebie from Marker Guru.

The image was super quick and easy to colour.  I matted it and used the airgun to add some colour to the background, though that could have been done with sponges.  The snow flakes in the background were added with liquid pearls, and the ring of trees was covered with holly green stickles.

Good luck as you do your last minute Christmas preparations!!

Challenges:
2 Sisters - Christmas
Stamptacular Sunday - Tree
Dutch Dare Challenge - Winter
Sew Many Challenges - Winter
Fresh Brewed - Merry Christmas
Stampin for the Weekend - Christmas
Wags N Whiskers - Snowflakes
Moving along with the times - Let it snow
Copic Creations - Sparkle

Sunday, December 19, 2010

Song inspiration

Sunday's here, and it's a week to Christmas!

This week at Sentimental Sundays our challenge is to make a card with a sentiment, inspired by a song.  I chose to use the song "I'll be home for Christmas" which is one of my favorite Christmas songs.

The main image is a Thomas Kinkaid one from Cornish Heritage Farms, stamped with Sepia Versafine on Glossy cardstock.  The light brown cardstock in the upper corner background is coordinations paper, embossed and sanded.  The sentiment is a digi from Raindrop Echo Designs, available at the Whimsy store.

At work last week we were playing Christmas music, and one of my colleagues was asking us each for our favorite so she could play it for us.  It was neat and interesting, and a bit surprising too, to hear which songs everyone liked best.  My favorite is a tied...I like the song "My favorite things" which is played a lot at this time of year, but I'm not sure if it's technically a Christmas song.  for a "real" Christmas song, I like Silent Night best.  What about you? 

Saturday, December 18, 2010

Colour challenge at CDAC and freebie

The countdown to Christmas continues....I hope you are all staying calm and taking the chance to enjoy the festivities!

Here is a card I made using a freebie from MarkerGuru that you can get at CDAC right now as part of a colour challenge.

You must excuse my card, the challenge was for a CHRISTMAS inspired card using pink, beige and blue green, but I didn't know about the Christmas part of the challenge or would have substituted some ornaments instead of hearts LOL!

So this morning I went to my dentist to get a couple of my teeth fixed, it was just a quick fix to keep them from being sensitive, and not covered by my medical plan, and he was so nice--he totally comped the charges and gave me a huge box of chocolates as a Christmas gift.....Wow!!  I have the best dentist.  I want to make a little set of cards for him as a thank you and know that House Mouse has some cute dentist ones so will have to check that out,  I'll let you know how it goes!

Anyway, as an update on the ornament and candle making, I had some setbacks yesterday....this is obviously a learning experience, three trips to Micheals later, and a few discards so far, but I hope to have something to show off for you by Monday :-)

Friday, December 17, 2010

Little Town of Bethlehem

Happy Friday!

The weekend is almost here, and it's just a week away from Christmas!  For my family, we celebrate on the 24th, so it's less than a week.....my oh my!!  I am off from work now until the new year, so that is something to be happy about :-)

Here is a a card I made a few days ago that I enjoyed working on.

  I used distressing, stitching, embossing, colouring.....all kind of fun techniques.  I keep looking at it though, thinking it needs something in the bottom left hand corner, perhaps some holly leaves?  I was delaying posting it as I wanted to keep playing with it, but time is running away on me right now LOL!  If you are looking for instructions on how to make this card, check out the Heartfelt Creations Blog.

So yesterday I went to Micheals for the first time in about a year.  I normally go to my local craft store which is a small one room shop in the countryside, or do all my shopping online, but I've been wanting some things like Mod Podge, Utee, and Super Seal to use on projects that I thought the best place to get would be Micheals.  I have to say, shopping online is so much better!  There were no sales people around, the store is big and stuff is all over, I searched the whole store and couldn't find the things I was there for.  It was hard to figure out what the prices on things were, and then the sales on things were confusing too....arg!

Anyway, here is a call out for help!!  I bought some ceramic ornaments, the ones that you can decorate, and need some pointers.  I also got some of those hollow glass and plastic ones.....if you've seen a good tutorial using these or have used them yourself and have some pointers please share.


Products Used on This Project 
Heartfelt Creations  Decorative Window Scene Die
Heartfelt Creations Town of Bethlehem 
Heartfelt Creations  O Little Town
Sparkling embossing powder and Versamark
Memento ink and Copics
Embossing folder (oh I wish they marked the names on them!)
SU creamy caramel ink for the distressing

Tuesday, December 14, 2010

Dressing a card up or down

Today I wanted to show you two glimpses of the same card, one is very quick and easy, and thin and mailable too, and the other took another 5 or 10 minutes to put together, and is probably better as a hand delivered card due to the thickness.  Both of these cards have been created using images from Heartfelt Creations.

The fact is, we need different types of cards, at different times for different people, and I wanted to show you how a  quick card could be dressed up....so if you do up a bunch of quick cards and put them in your stash and then suddenly need a special card for an extra special person, then you have an idea of how to dress it up pretty quick.

So here is the base card:


As you can see, it is a pretty easy card to do.  I did this up as a sample recently before a craft day with my MIL and SIL, and I can say that we made a LOT of these that day!  A bit of masking and sponging, the colouring isn't too detailed, and the sparkle of the Stickles on the snowy areas really dresses it up.

Now here you can see what I did to one of them, to fuss it up extra special:

I added a swirl, a flower, and a sentiment.  That's it!  The extra work didn't take long, just a couple of extra die cuts is really all it took.  And none of these embellishments cost a lot to add, which is good for my Christmas budget!

I bet some of you folks would like instructions on these, so I'll refer you the the Heartfelt Creations Blog, where the instructions are posted today.  If you would like more details, please let me know in the comment section and I'll be happy to pass that info along.

Also, if you haven't participated in my survey on the side bar, please do so, I'm interested in the results.  And if you previously voted but your answers have changed, it lets you update it....

Have a great rest of the week, I'll be back to check in with you in a few days.  Good luck with your Christmas preparations and enjoy the festivities of the season!

Products Used on This Project 
HCPC 3347 Cardinal Bird Feeder PreCut Set 
HCPC 2291 Regal Poinsettia 2 PreCut Set 
415223 Nestabilities Blossom 2 
HCD 702 Decorative Butterfly-Border Die 
HCPC 3348 Cardinal Pine Cone Border PreCut Set 

Metalic rub on paste (around edges of sentiment)
Memento black ink to stamp image and Copics to colour
Stickles and rhinestones

Challenges:
A spoon full of sugar Challenge 133 - Christmas Card
Ladybug Craft Ink challenge Winter Wonderland
Creative Card Crew challenge Anything goes
All Sorts challenge Last Minute Christmas
Craft your days away - Punches and die cuts

Monday, December 13, 2010

Christmas is coming!

So the mass production of cards has continued, and my cards are almost all ready but none of them have been written in them or mailed yet....eek!  Am I the only one???

Here is a cute card I made this past week that was super quick to make and I think looks great, especially in person.  I used a freebie digi from MarkerGuru for this (still available, you may want to snag it while you can!).
I used some new fuzzy flock stuff I just got recently on the white parts of the hat, which is nice since it feels fuzzy when you feel it, and it does a good job of hiding the red ink that went where it shouldn't of LOL!

So an update on my Christmas readiness....Tree is up, but I realize now it is pitifully bare, and hubby says no new decorations till they go on clearance on the 26th....think I will make some of my own ornaments, we'll see!.....the outside lights are up, just a few but enough....I have baked one type of cookie (out of my normal 6 or so) and one christmas cake.....
What about you all?  how are your Christmas preparations going???

Sunday, December 12, 2010

Let it snow!

This week at Sentimental Sundays we have a challenge for you to create a card with a sentiment, the theme being "Let it Snow".   I know you are all swamped with last minute shopping and decorating and meal planning, but I bet you need a couple of extra cards too, and so I hope you'll play along with us :-)

Here is my creation, I hope you like it!


The main image is a Cornish Heritage Farms stamp, and I've used it previously for Summer and Autumn cards, just switching up how it's been coloured.  This time I added lots of flowersoft and glitter.  The blue sky in the main panel with the deer is airbrushed.  Used white pigment ink for the snowfakes and edging of the blue panel.

It's a standard A4 envelope size, and while it is a bit thick, it's gonna make it in to a regular envelope...yay!

What are your Sunday plans?  I have to clean our freezer and make room for Turkeys...yes, Hubby tells me he's bringing home two (2!!) Turkeys from work as a Christmas gift, but where will we put them?!  Eek!!  Better find a way to bake up all those berries that are filling up space, or something, before then LOL!


Saturday, December 11, 2010

Thinking of sunny skies!

One of the things you might know about me is how much I LOVE vacationing in tropical destinations.  It is my #1 thing I'm willing to spend money on apart from craft stuff...who needs fancy clothes and shoes, give me craft supplies and an annual vacation, and I'm happy LOL!

I saw a card on Marlene's website (Disguised as a Grownup) this week and knew I had to CASE it.  You can find her card at this link:   http://disguisedasagrownup.blogspot.com/2010/12/christmas-cheer-give-it-up-already.html  Her cards are always fresh and fun, and I think my hubby secretly likes her cards better than mine, so I thought he'd like sending some of these cards off to friends of ours that we travel with.  

Here's my version--I whipped off a bunch of these late at night, so ignore the little oppsies!
The image is a digi from Bonibleaux Designs, and she emailed it to me with a bunch of sentiments super quick after I ordered it, hence the late night card making.  I stuck with this one from Marlene as our tropical vacations are usually to All Inclusive resorts with quite a bit of beverages being consumed, so this sentiment looked just right!

What you may not be able to tell from the photo is what  a hard time I had photographing it!  My super spoiled kitty cat decided he wanted to sit for the photo, and he was not budging.  See the stubborn look in his face here?  I could have moved him, but then I'd feel guilty....much better option to just get a crooked picture :-)
Have a great day, and good luck with getting the last of your xmas cards done and out!

Post edited to add:
Ok, I've had a couple questions about my little guy.  He is a Cornish Rex, which means he is only supposed to have two coats of hair, not the regular three, and it is supposed to be short and curly....but he never had much hair, in fact when we got him he had less that this.  You can't see it but he's covered in short fuzz.  I use alcohol free etc. baby wipes to wipe him down since he gets dirty easy.  Right now he's burried in his nest of blankets on the couch...with so little hair he is cold a lot of the time!

Tuesday, December 7, 2010

Window frame

It's that time of week again when this weeks fabulous creations by the design team for Heartfelt Creations are unveiled.  I am impressed and inspired each week by the great designs and all the creativity...in fact, as I was working on my Christmas cards to mail this week I went through all those posts to get ideas to case!  I've got 80 cards and need over 100, so I'm not quite there yet LOL!

When I saw this new window frame die from Heartfelt Creations I immediately knew I had to create a window scene with curtains.  Here is my first attempt with this, which I thought came out well!


So are your trees up and decorations up?  I've got a fun poll set up right now, I'm interested in seeing the results, so please play along...it's on the right hand side bar.

Products Used on This Project
HCD 708 Decorative Window Die
415217 Fancy Tags Nestabilities 
977D Three Spruce 
HCPC 3338 Petite Medallion Background PreCut Set
HCPC 3349Cardinal Holiday Mailbox PreCut Set (sentiment)

Acetate sheet
Embossing folder (sorry, don't remember name or brand!)
Coordinations cardstock (with white core to sand better)
lace from fabric store
White staz on ink for the snowflakes on the window sheet


Instructions:

Cut out frame using die cut. Hand cut a piece of acetate (clear card stock) to fit in the window, stamp with snowflakes using Staz on white ink. Adhere acetate to back of window frame, set aside. Stamp trees in green ink on white card stock, colour in background blue. Cut out to fit window frame, and adhere to back of window using pop up dots. Stamp sentiment in black ink on white card stock and cut out using label die cut. Create background using an embossing folder, adhere all pieces together, then add lace around the window to look like curtains.

Monday, December 6, 2010

Christmas Robot

Hi folks!

I see that there are a few new followers after the blog hop this past weekend, and want to extend a welcome to all of you new folks!  I couldn't believe how many folks came through my site for the blog hop....I received in the range of 500 comments!!!  I have to tell you, I usually return the love when it comes to commenting, so if you leave me a comment I'll come and visit you, but I had to break that rule this time round.   Even if I only spent 1 minute going to each site that would be 500 minutes or 8.3 hours!

Anyway,  today we have a fun card using a fresh image from Marker Guru.

The image is a freebie from MarkerGuru that is still available for a few more days, so get it while you can!    After that it will be in the shop.  It took all of 5 minutes to colour this, using my C1, T2 and T4 markers mainly, with some green and red etc. for embellishment.  In behind the robot you can see I airbrushed a bit of colour for a background.

The bow is made with my handy dandy bow-easy, and the sentiment is from an embossing folder.   An embossing folder, using the letterpress technique, was also used to create the poinsettia paper in the background.  Simply ink up the embossing folder before adding the paper.

I've got a couple of neat projects I've done up recently I'll be posting over the rest of the week, and I'm working on putting together a tutorial on a mini accordion album, so keep your eye out over the next couple of weeks for some new things!

Friday, December 3, 2010

Scrap-Mart Blog Hop!


Hi folks!

Today I've got a project to share with you as part of an awesome blog hop with lots of prizes!  

Here are the details of the blog hop:

Welcome to the First Annual Scrap-Mart.com Blog Hop! If you are just joining in please go to the Scrap-Mart blog to start from the beginning. There are 31 blogs participating in the hop and you will find some great prizes along the way. You must comment on THAT blog post to be eligible to win that prize. There are also some Grand Prizes posted on the Scrap-Mart blog. You must comment on EVERY blog throughout the hop to be eligible for the Grand Prizes. Comments will remain open until midnight CST on Sunday, December 5th.  Winners will be chosen at random for each individual prize and will be announced on the Scrap-Mart blog on Friday, December 10th. You may only win once. We'd like to thank our sponsors for generously donating all the prizes for this hop:  Making MemoriesSpellbindersJustRite StampersSizzixHeartfelt CreationsLifestyle CraftsThe Stamps of LifeBoss KutUnity StampsOctober AfternoonCopicSilhouette America.

And here's my project, a little tag set for Christmas....I think this will make a great pre-Christmas gift for a friend.


Products used:

The box for this tag set was created using a tutorial on SCS available here:http://www.splitcoaststampers.com/resources/tutorials/tagbox/

For long and thin tags featuring cardinals: Stamp cardinals in brown ink on white card stock, colour (Copics used here) and cut out using coordinating die cut. Cut rectangle from white cardstock using die cut. Stamp branches in green ink, add brown ink to branches, and add colour to background using sponge or Airbrush. Adhere the cardinals using pop up dots. Punch hole in top of rectangle, add eyelet, and tie ribbon through.

For round tags featuring holly and berries: cut scalloped circles from red card stock using die cut. Stamp berries using green and red ink on white card stock, cut out with circle die cut and add brown background with sponge or Airbrush. Adhere white circle with image to the red scalloped circle. Punch a hole in the top, add an eyelet, and run ribbon through. Apply 3-d Crystal laquer to top of holly leaves and berries.

For tags using Label 3 featuring pine cones: Stamp pine cones in on white card stock and cut out with die cut. Colour and add ink to background, then add glitter. Punch a hole in the top, add an eyelet, and run ribbon through.


The next stop along the way for the blog hop is Olga's site,  http://www.craftieodamae.blogspot.com/


Wednesday, December 1, 2010

Carolling Bears

Happy December 1st!!!  We are now in the months of Christmas, with Christmas music and decorations everywhere you go LOL!

Here I've got the sweetest card for you made using an image of Carolling Bears from Heartfelt Creations, as well as using that new Window die.


Products used


HCD 708 Decorative Window Scene Die
HCPC 2291Regal Poinsettia 2 PreCut Set 
1276H Christmas Carols 
1275G The Midnight Clear 


Instructions
Stamp swirly holly image randomly in black over the edges of green cardstock, then colour in leaves and holly berries. Dab light brown ink over edges. Set aside. Stamp sentiment in black ink on neutral cardstock. Dab light brown ink over edges. Add ribbon and bow. Set aside. Cut out frame using die cut. Spray with glimmer mist. Hand cut acetate (clear cardstock) to fit within the window and adhere to back of frame. On back side add liquid pearls to edges of window panes to resemble snow. Stamp bear image on to white card stock using black ink and colour (Copics used here). Use liquid pearls to highlight falling snow as shown in stamped image. Hand cut image to fit in frame and adhere to back of frame using pop up dots. Attach all items together as shown in photo.